
If you’re looking to create an HTML form online without having to code, you’ve come to the right place.
In this guide, we’ll show you:
- How you can embed forms on your website that can collect payments, signatures, contact information, and customer feedback, all without writing a single line of code.
- How you can connect your form to third-party applications like Google Sheets and Trello and have actions happen automatically inside their applications when someone submits a form.
- How you can have AI create a form for you by typing a simple prompt into a chat box.
Note: We're MightyForms and our goal is to fix everything we believe is wrong with the form building industry. In addition to making it easy to embed forms on your website, we automatically recover abandoned leads and use AI algorithms to identify weaknesses in your form. So if you’d like to skip this guide and get a first-hand idea of what MightyForms can do, sign up for a free trial. You don’t have to enter your credit card details.
Step 1: Create a form or select an existing one
For this guide, we'll be using MightyForms to create an HTML form because the entire process takes less than five minutes, and there's no coding required.
Begin by logging into your MightyForms account, and you'll find a dashboard that looks like this:

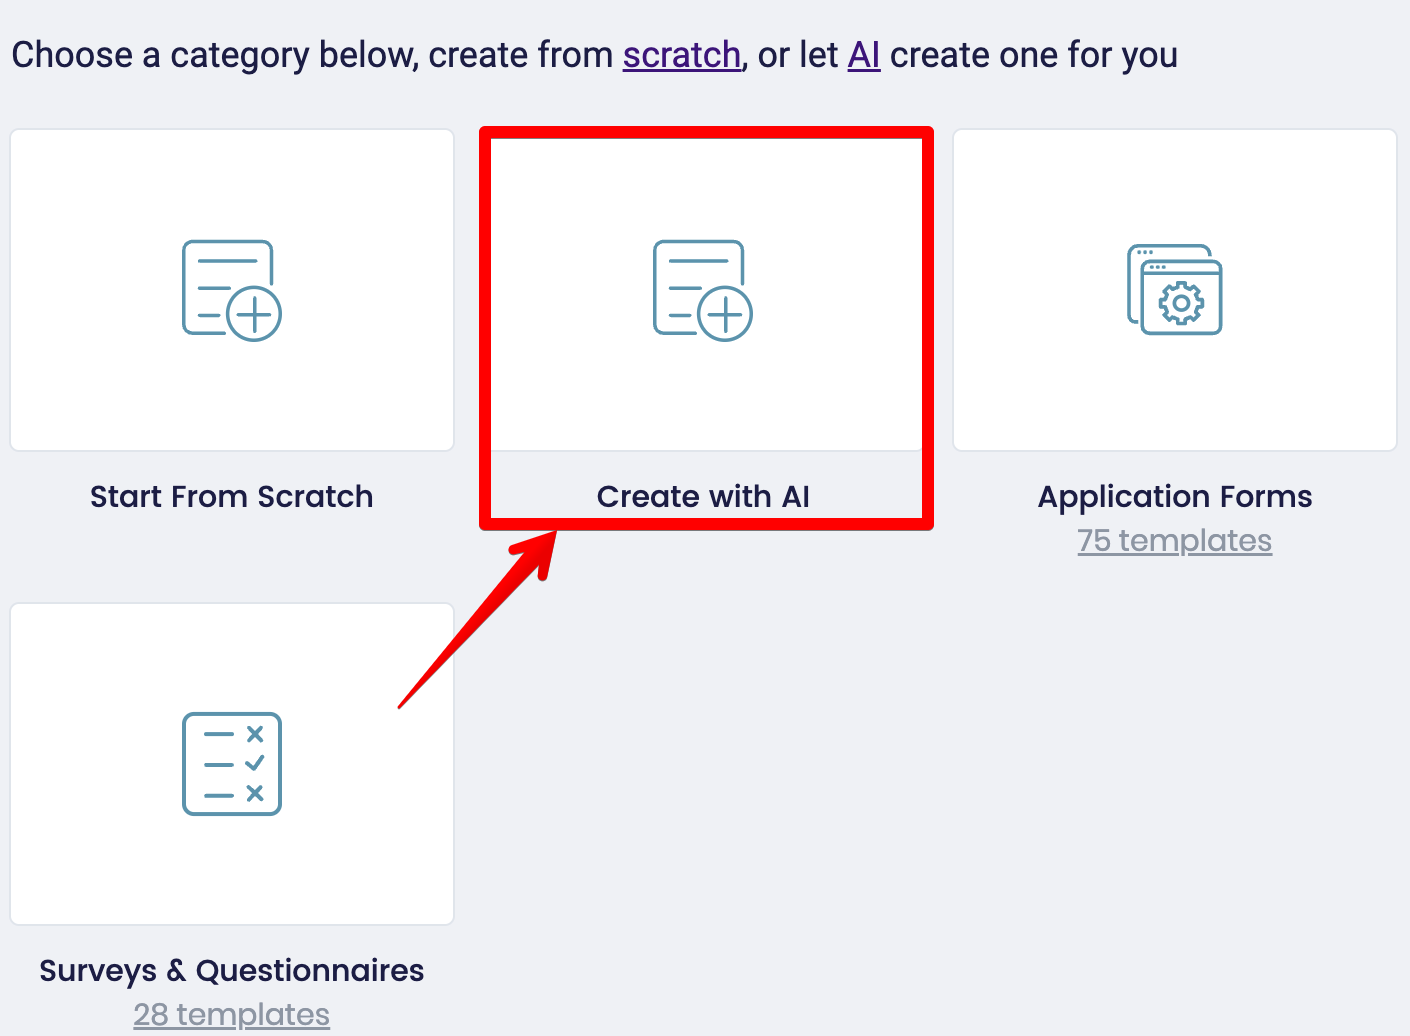
You can create a form from scratch or choose an existing form.
If you're creating one from scratch, click "Create New Form," and MightyForms will take you to this dashboard.

Choose a template you'd like to use for your form, or you could ask the AI to create a form for you by clicking the "Create with AI" icon.
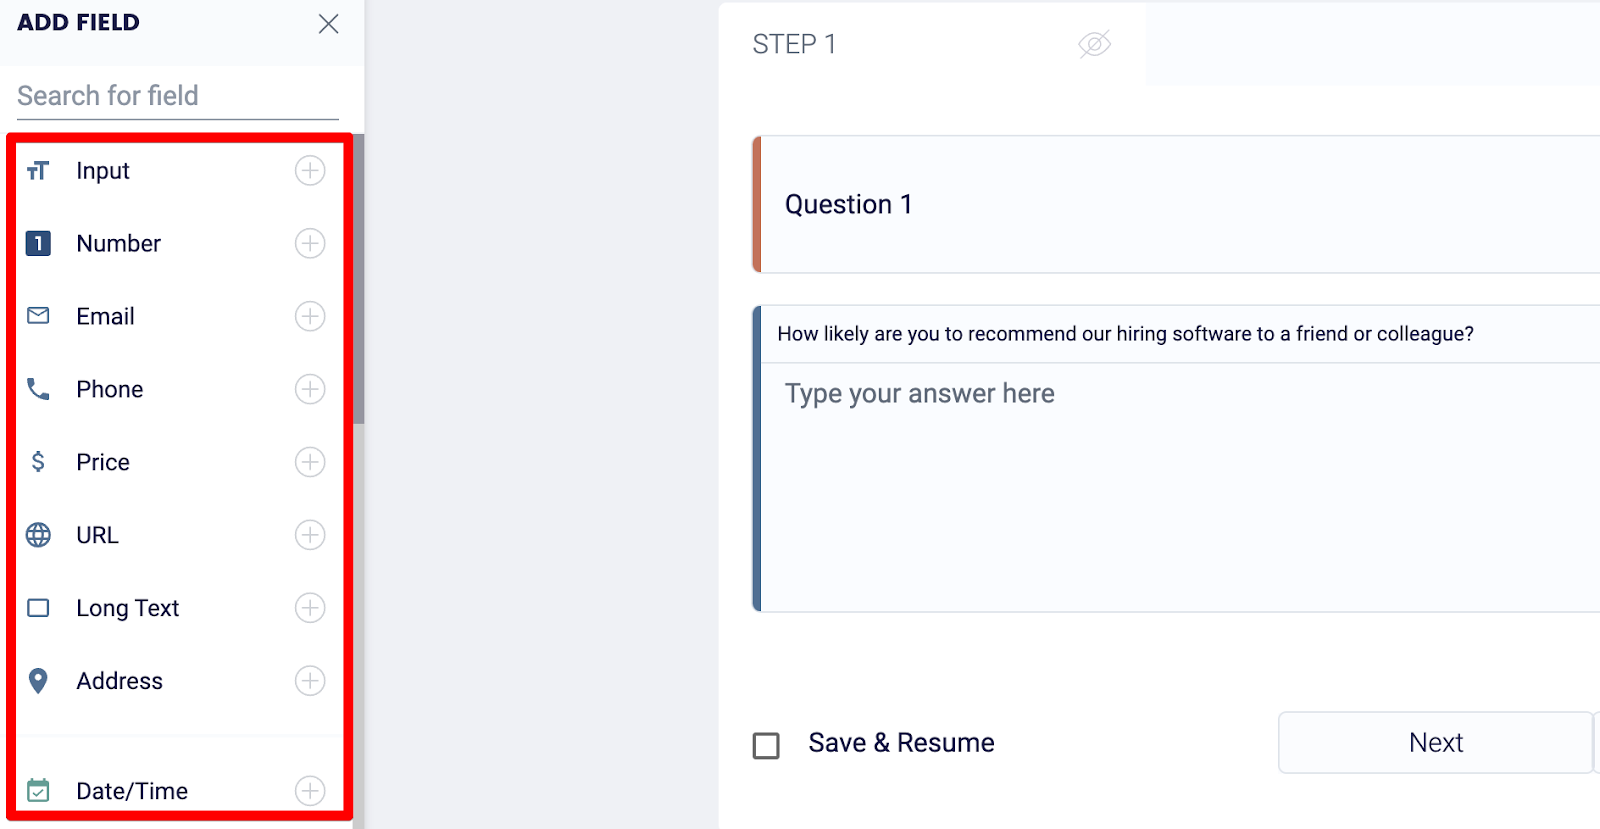
Simply type a prompt into the input field, and MightyForms will produce an output.
In the example below, we typed “Create an NPS form asking my customers five questions about my hiring software,” and MightyForms produced this form:

You can get more detailed by giving the AI a description of your product and its features, talking about your target audience, and mentioning the type of information you want to collect.
Step 2: Customize your form design
Once you've selected a template or had the AI produce a form for you, you'll be taken to the editor dashboard.
Here, you can add various types of questions and change the layout of your form.
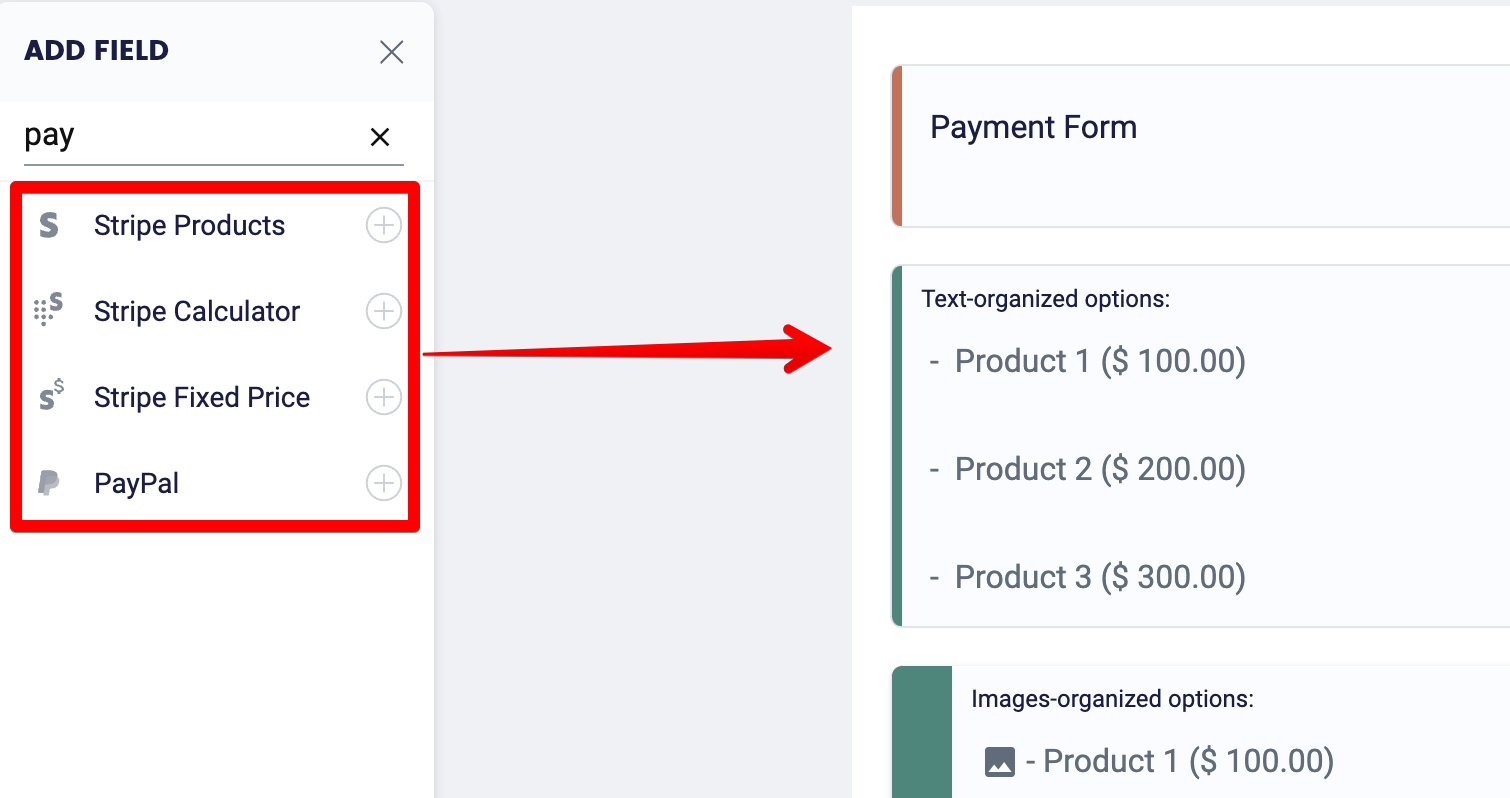
For example, if you want to collect payments from customers, you can drag and drop a Stripe or PayPal field from the left-hand side.
When you're happy with all the questions in your form, click the paintbrush button to customize the design.
On the left, you'll find a bunch of themes that you can add.

On the right, there are more advanced settings allowing you to change the font size and style, customize the border, add a background image, and more!

Step 3: Generate the HTML code
Once you're satisfied with how your form looks, click the "Publish" button in the top right-hand corner, and this saves all your changes.

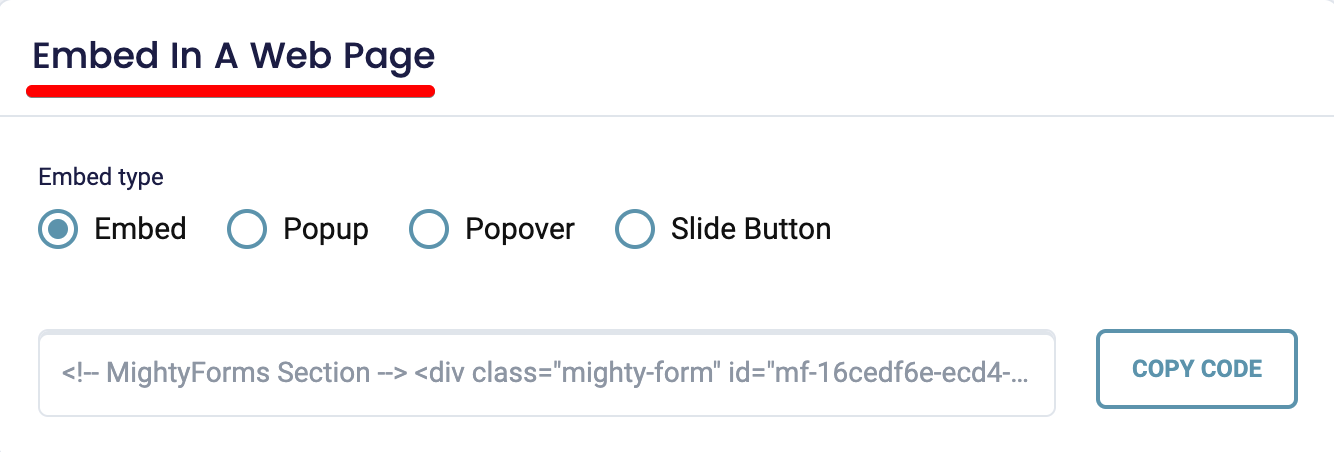
Next, click the "Share" button, and you'll find various ways to share your form:
- Embed on website
- Share via email
- Share via link
For this guide, we'll be using the "Embed on Website" code snippet. Copy this snippet and head over to your WordPress editor.
Step 4: Add the HTML code to your website
Go to the page you'd like to add your visual HTML form to, right-click inside your editor, and add a custom HTML block.
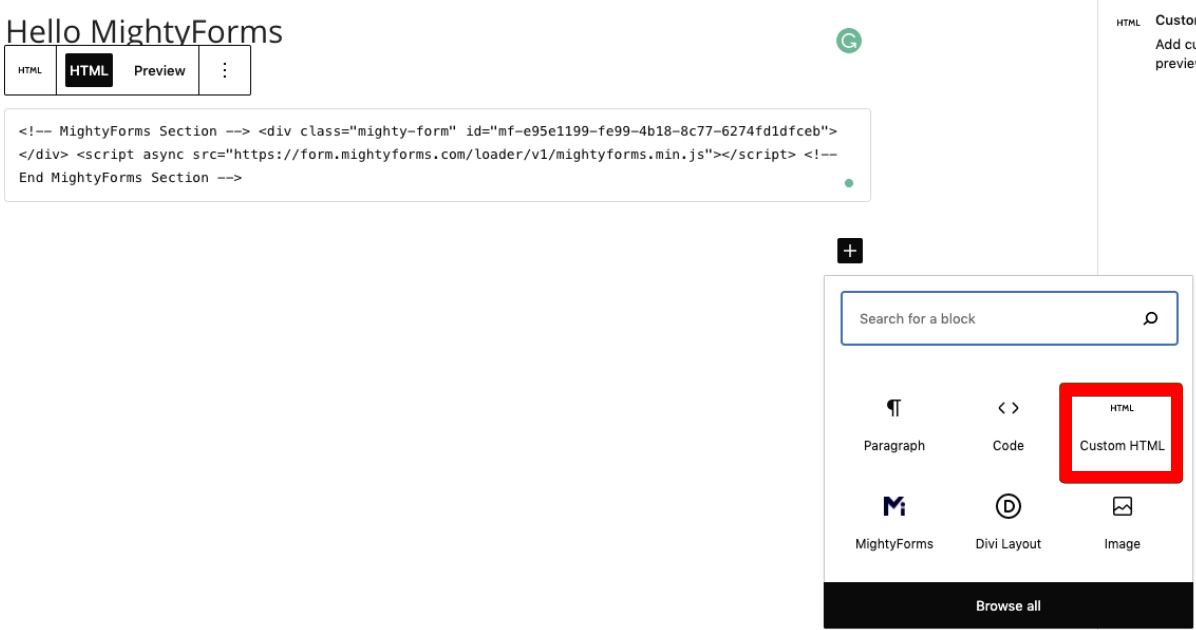
Paste the MightyForms code snippet inside this code block, save your changes, and you'll find your visual HTML form when you land on the front end of your website.
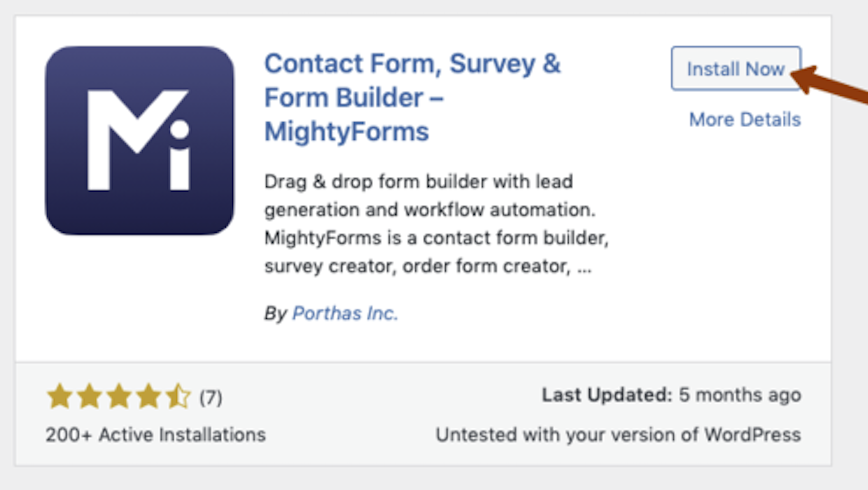
Alternatively, you can download the MightyForms WordPress plugin inside the WordPress marketplace. It looks something like this:
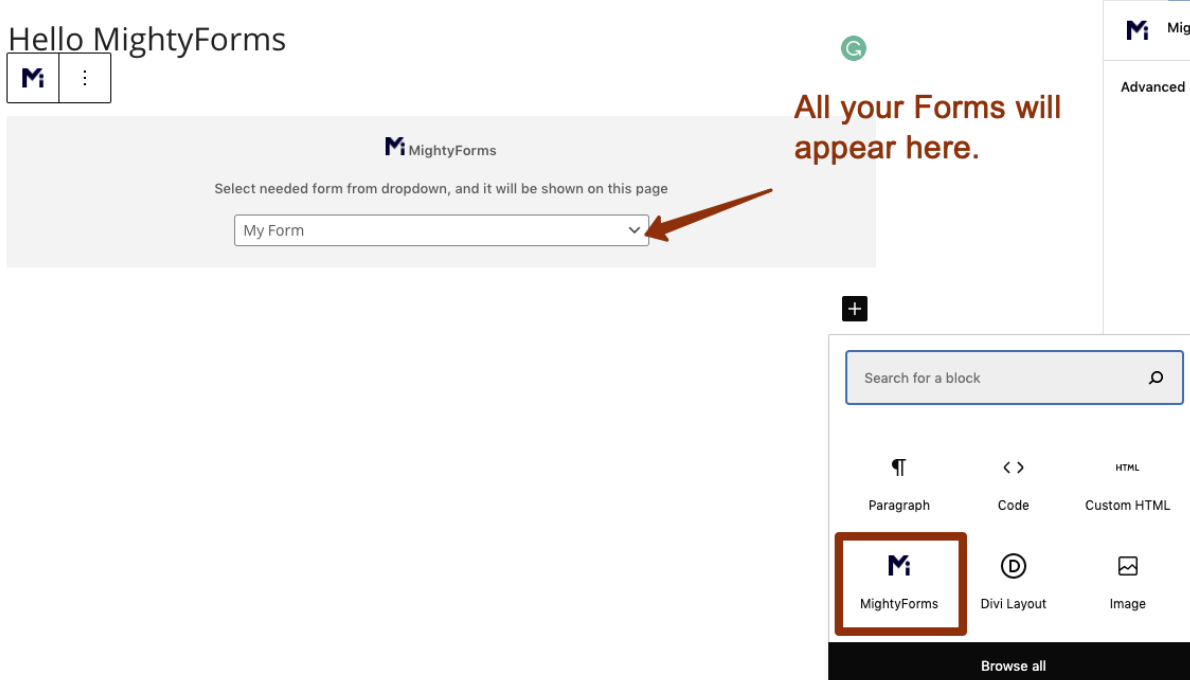
You can then right-click inside your editor, choose the MightyForms block, and this will allow you to add any form from within your MightyForms dashboard.
Step 5: Connect to third-party applications
MightyForms directly connects to 40+ applications and indirectly connects to thousands of other applications via Zapier.
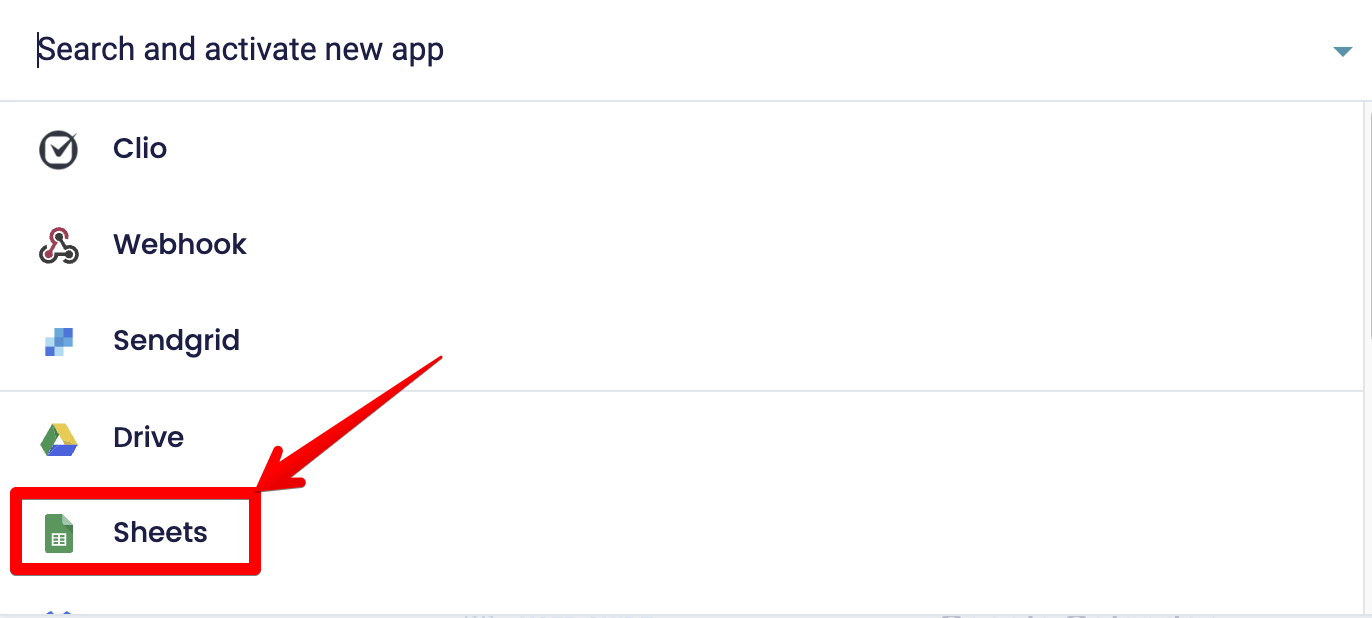
So, for example, if you want to store your form data inside a spreadsheet but you don’t want to manually copy and paste every response, simply connect MightyForms to Google Sheets. You can do this by clicking on the little square icon on the left of your screen. This is the integration button.

Select the Google Sheets logo and you’ll be prompted to log into your Google account.
Once logged in, MightyForms will automatically create a new sheet named after your form name and ID. It’ll then send all form data to this spreadsheet where you can look through it and share it with your team.
Although we used Google Sheets as an example, the integration process is similar for all MightyForms integrations.
Step 6: Track your HTML form's analytics
Once you've published your visual HTML form, head back into your MightyForms dashboard and on top of your screen, you'll find a "Submissions" button.
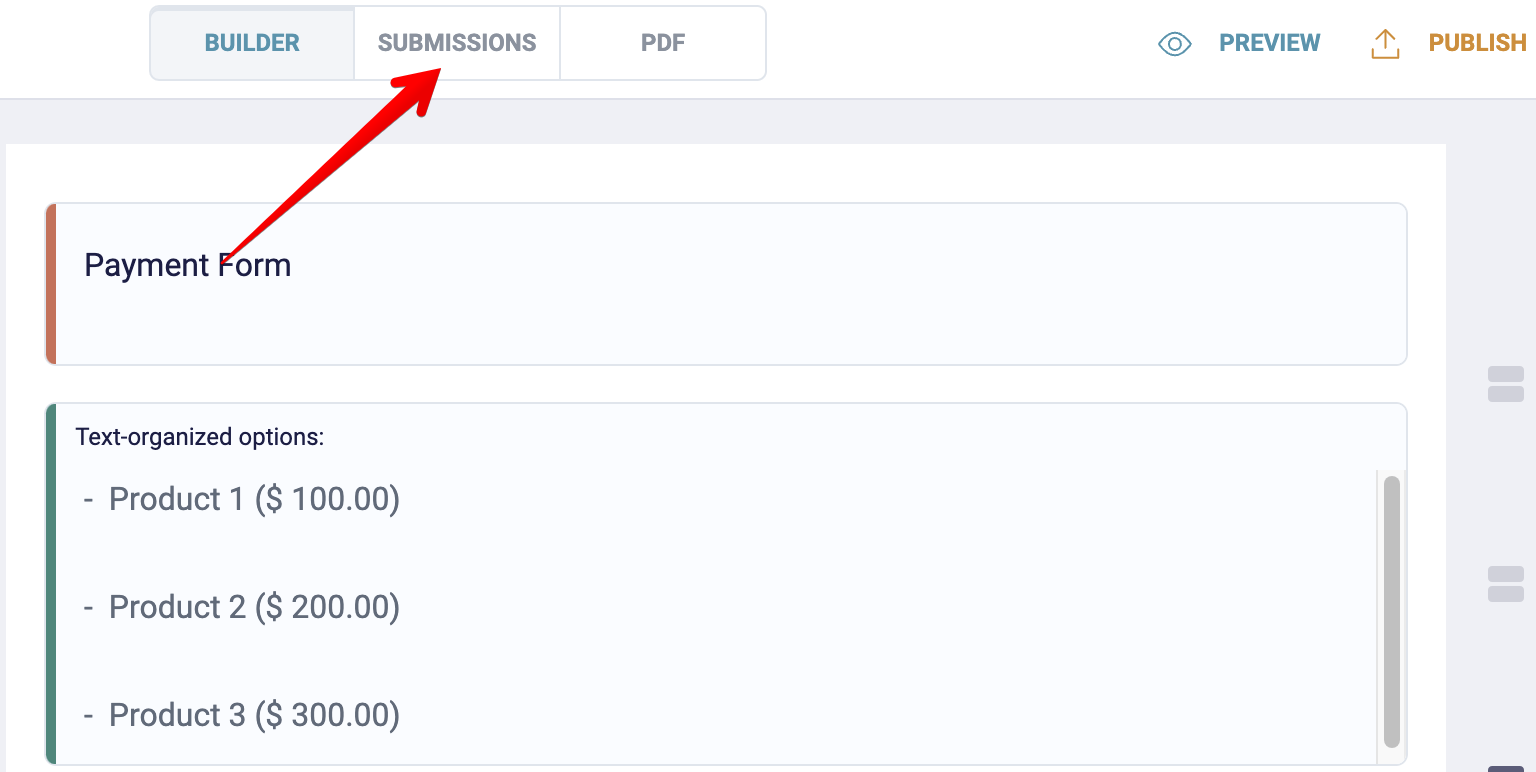
This feature gives you access to advanced analytics; you can see how long users spent on your page, where they dropped off, where they are coming from, and how many of them bounced without answering a single question.
We also recommend using MightyForms' AI analytics feature, as it'll analyze your form for you and provide feedback you can use to improve completion rates.
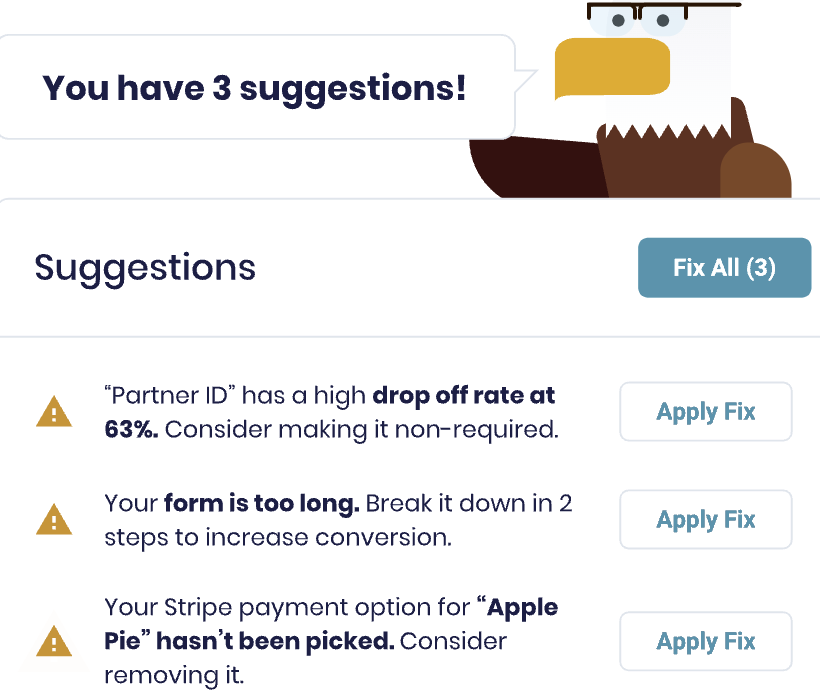
For instance, if the AI sees that everyone bounces before a specific question, maybe because it's too long, then the AI will suggest shortening it or splitting it into two. Or, if nobody is using a certain field on your HTML form, the AI will recommend removing it.
What sets MightyForms apart from other online form builders?
These are a couple of factors that we believe set MightyForms apart from most online form builders:
- Automatic abandoned form recovery
- Advanced AI analytics
- Payment collection
- NPS calculator
- AI form builder
Automatic abandoned form recovery
With MightyForms, you can see what a user typed into your form, regardless of whether they submitted it or not.
This makes it easy for you to recover abandoned leads. If a user types their first name and email address and bounces, MightyForms will send them an automated email, prompting them to complete your form.
Advanced AI analytics
Many users also like the AI analytics feature inside MightyForms because it identifies weaknesses that their form has and recommends ways to fix it.
The AI does this by finding patterns where users drop off. It then uses these patterns to make recommendations on how you can improve. For example, if the AI finds that most users bounce before the e-signature field, it’ll recommend removing it.
Payment collection
You can also collect payments inside your form and have the funds go directly to your PayPal or bank account.
All you have to do is drag and drop the Stripe or PayPal field onto your form. Log into your Stripe or PayPal account, and you’ll be able to collect payments from your customers.
This is a major limitation with Google Forms and other form builders. They don't have the security features needed to collect payments. You'll have to paste a link to your website checkout page, which adds extra steps to the process, ultimately increasing bounce rates.
NPS calculator
If you want to calculate your product’s NPS (Net Promoter Score), you can do so within minutes by creating an NPS form inside MightyForms and publishing it on your website.
MightyForms has a built-in NPS calculator that presents you with all the scores your customers give you, as well as an average score. This average score automatically updates every time someone completes your NPS survey.
This way, you don’t have to manually crunch the numbers to calculate your NPS. Everything is done by the MightyForms calculator.
AI form builder
The last differentiating factor between MightyForms and the alternatives is the AI form builder.
MightyForms uses AI to speed up the time it takes you to build a form. Simply tell the AI what type of form you want, what information you want to collect, and how you want your form to look, and the AI will create one for you within seconds.
From here, you can tweak the form by changing some of the questions, moving the headings around, and adding a background image.
Next steps
If you want to create an HTML form online without having to write code or go through a long setup process, sign up for a free MightyForms trial.