
Before we founded MightyForms, we’d create forms inside Google Forms. The basic email notification features were great, but we couldn’t send automated follow up emails to users who bounced, nor could we personalize the email a user received based on their response.
This is why we built MightyForms. We wanted to give you the ability to recover abandoned leads by allowing you to see a user’s email address regardless if they submitted your form or not, so you can recover abandoned leads.
You can also send personalized emails to users depending on their form responses using our conditional logic tool.
This is what customers are saying about MightyForms’ email notification features:

So if you’re interested in learning how to create an automated website email form within minutes, this guide is for you.
Note: If you’re looking for a form builder that sends automatic emails to you, your team, and your user, then consider signing up for a seven-day MightyForms free trial.
Step 1: Log into MightyForms
To create a website email form, log into your MightyForms dashboard. If you don’t have a MightyForms account, you can open one for free without entering any credit card information.
Step 2: Choose a website email form template
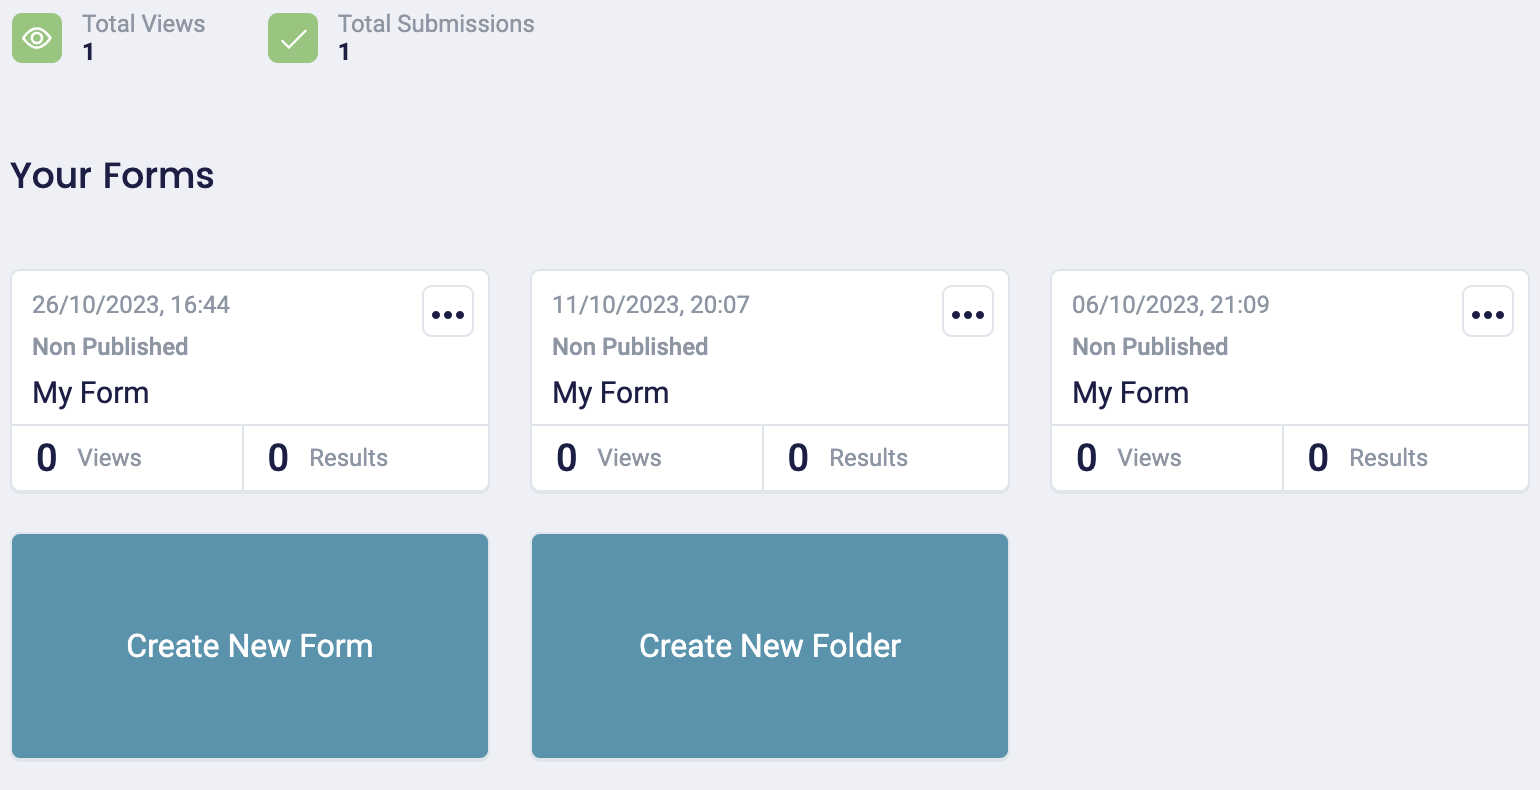
Once you’re logged in, MightyForms takes you to a dashboard that looks like this:
Select the “Create new form” button, and you’ll find templates for contact forms, payment forms, job application forms, surveys, and countless other types of forms.
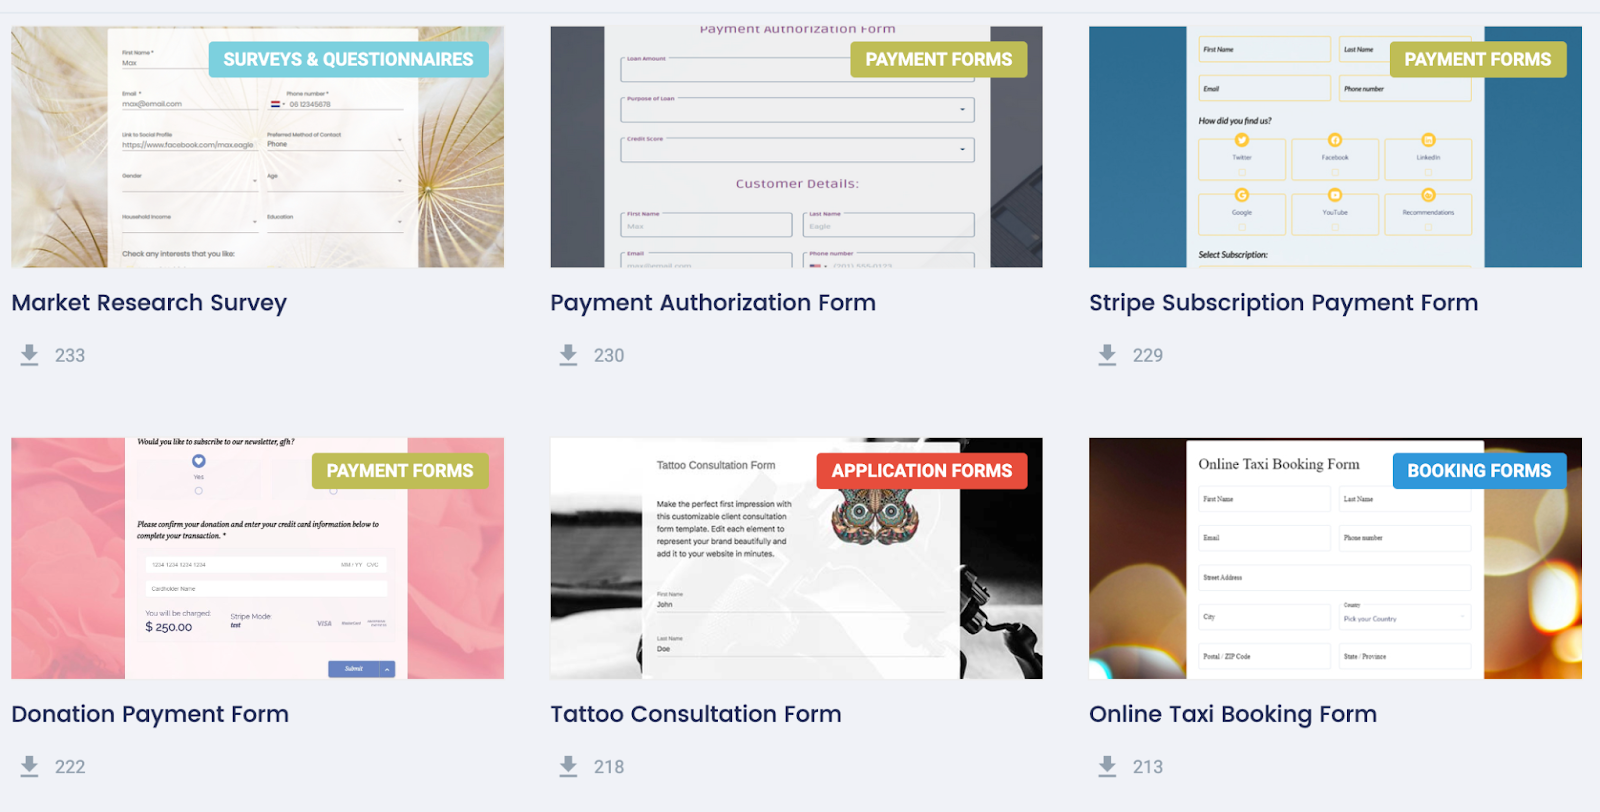
You can choose one of these templates as a base to work from or build a form from scratch.
Step 3: Customize your form using MightyForms’ easy drag-and-drop functionality
When you select a form template, you’ll land on a dashboard that lets you customize your form.
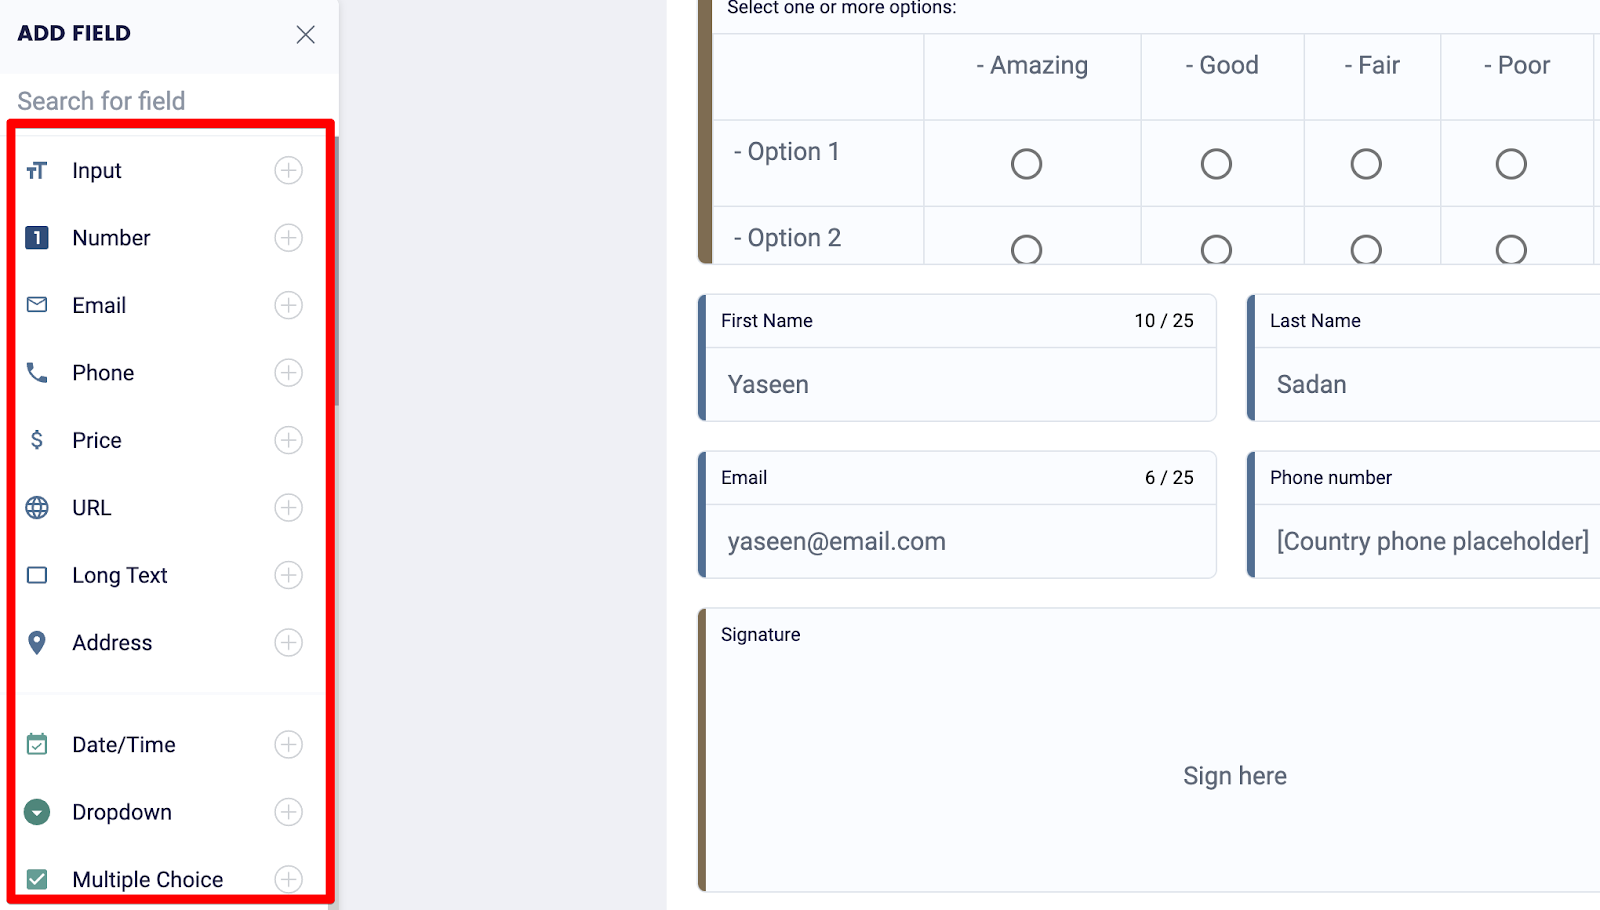
On the left, you’ll find fields for users to add their names, email addresses, credit card details, signatures, and more. Feel free to add, remove, or move these fields around depending on how you want your form to look.
For example, let’s say you’re collecting payments within your email form. You could drag and drop a Stripe or PayPal field onto your form and users will be able to add their credit card or PayPal details, allowing you to collect payments.

Or, if you want to change the questions you ask users based on what they previously answered, select the icon on the left-hand side of your dashboard with the two arrows, and you’ll be able to add logic rules.
Step 4: Set up email notifications
All our forms come with automatic email collection and lead recovery.
This means that if someone lands on your form but doesn’t submit it, we’ll automatically send them an email prompting them to complete their form. We do this by collecting a user’s information regardless of whether they submitted your form, giving you a second chance to convert users.
But you can customize email notifications further by sending a new user a welcome email or letting you and your team know someone has submitted your form.
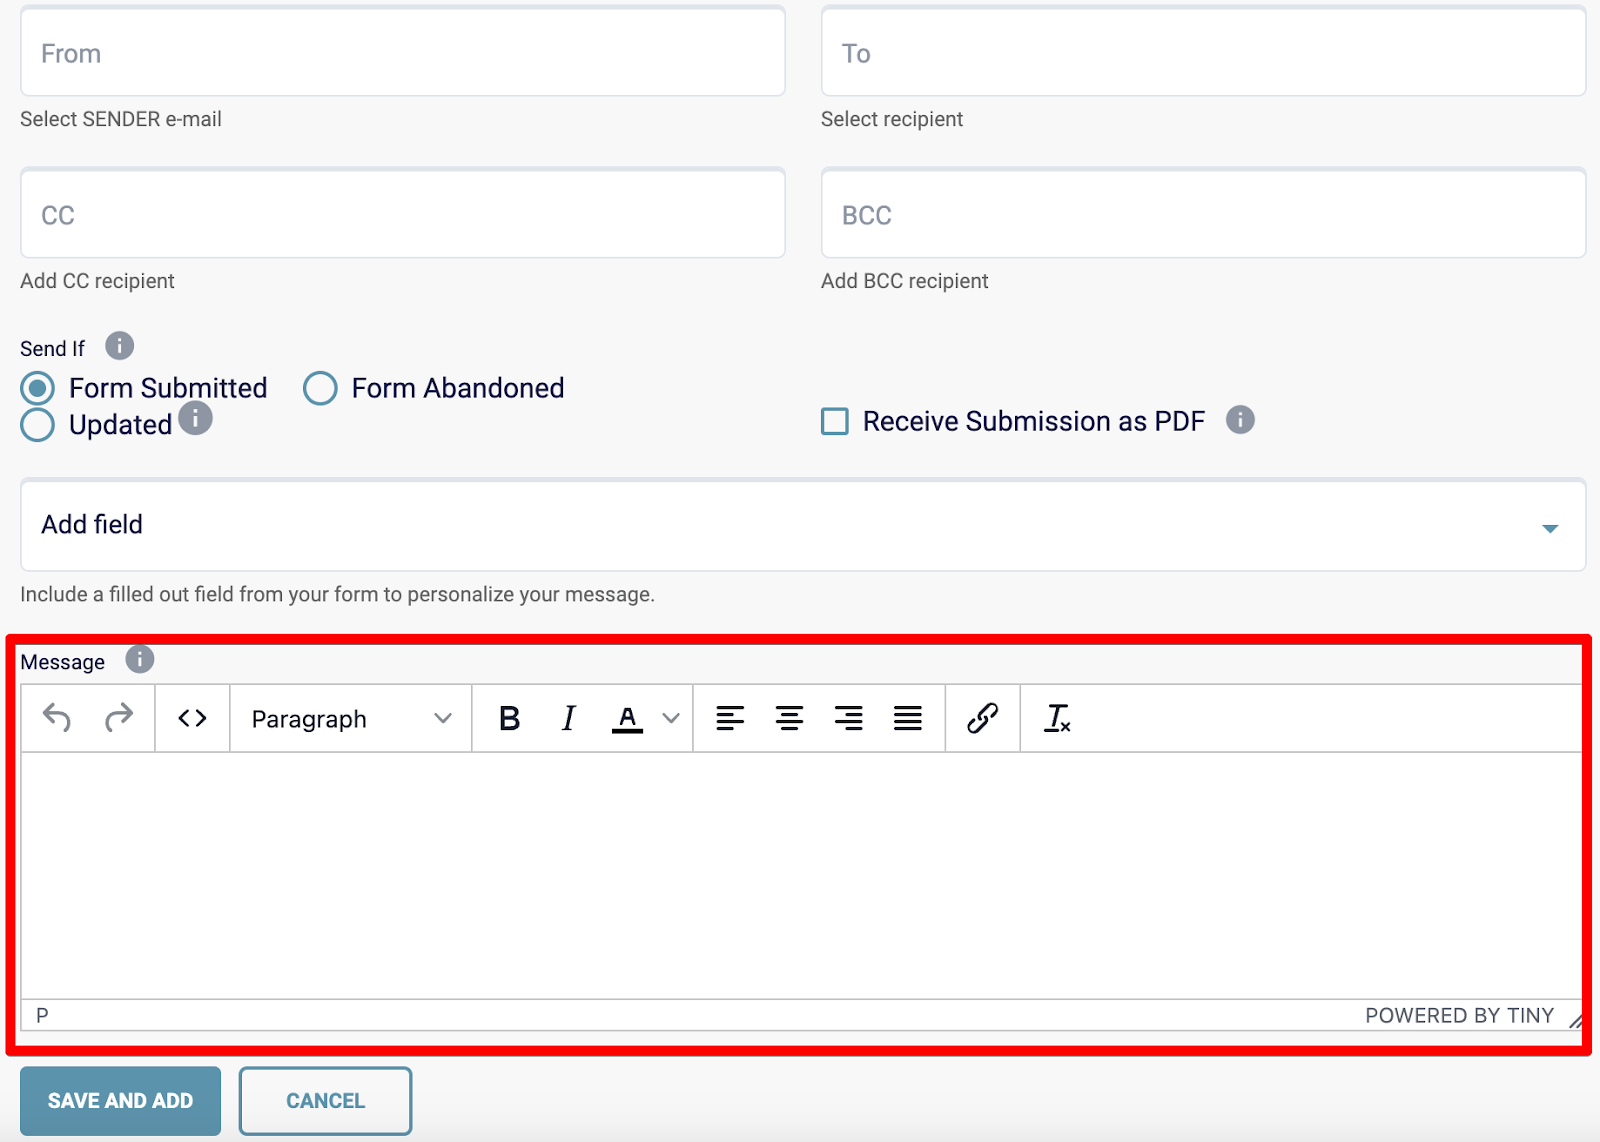
To utilize this function, click the icon with the three dots on the left-hand side of your dashboard, and MightyForms will direct you to a dashboard that looks like this:

Select “Add new notification” and enter all the details about your message, i.e. the recipient’s email address and your personalized message.

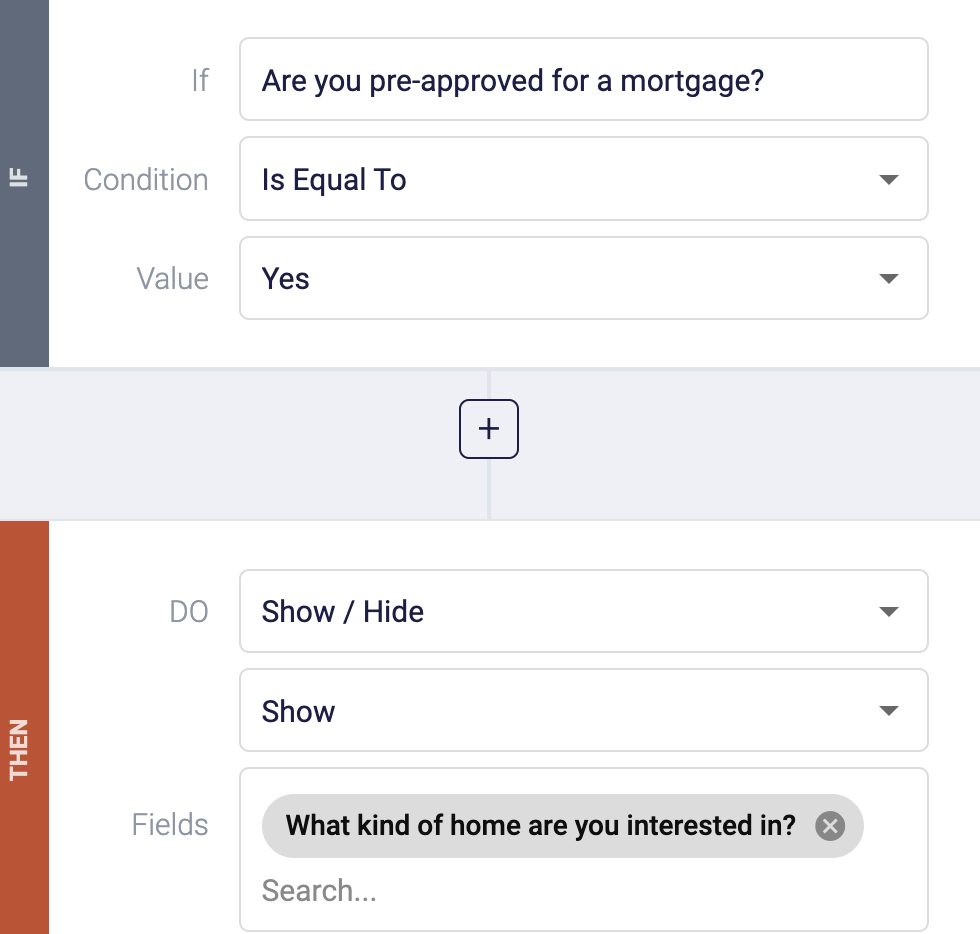
Or, if you want to send personalized emails to users based on what they typed into your form, you can use the conditional logic feature mentioned above.
Simply navigate to the conditional logic dashboard and create a condition that needs to be met in the “IF” section. For example, IF the user selects “SEO services” THEN send an update to the user’s email address.
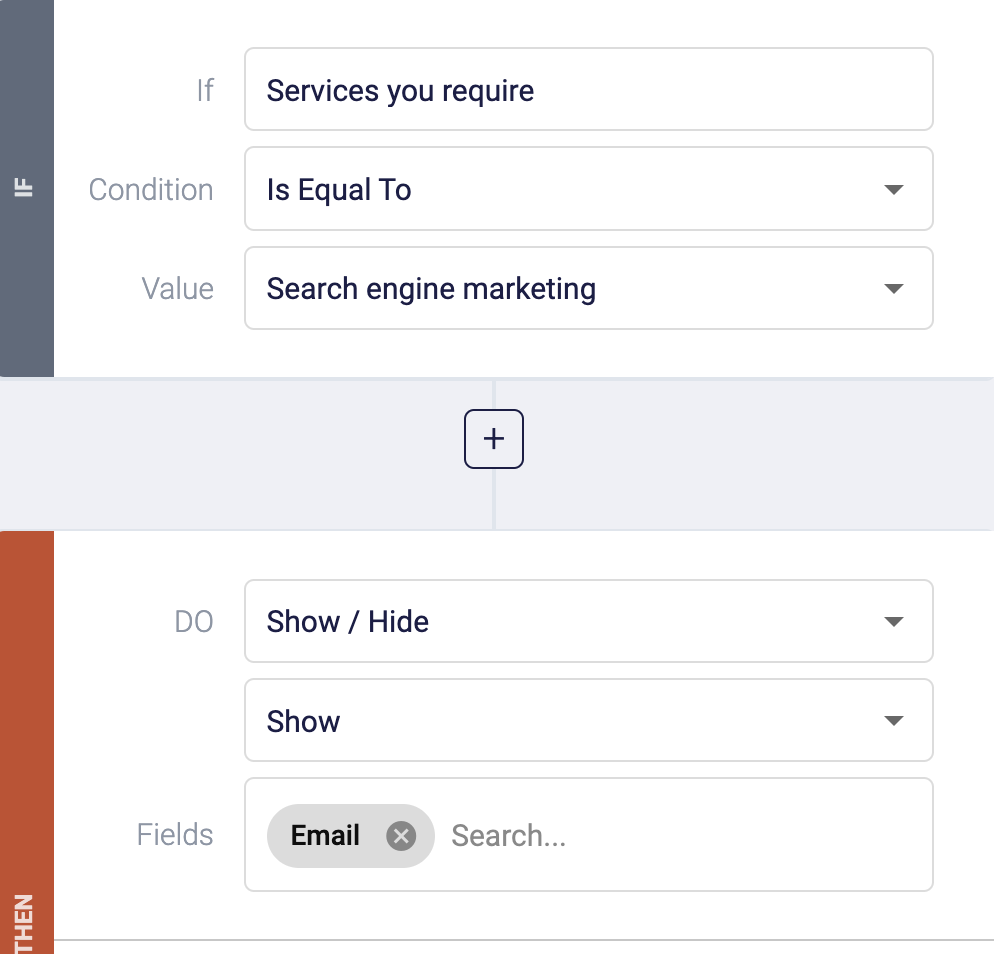
To personalize this update, go to email notifications and write the email you’d like to send users if they select “SEO services.”
You can then do this for each option that you offer, such as, “PPC services,” “Video marketing services,” and “Social media marketing services.”
Step 5: Test your form
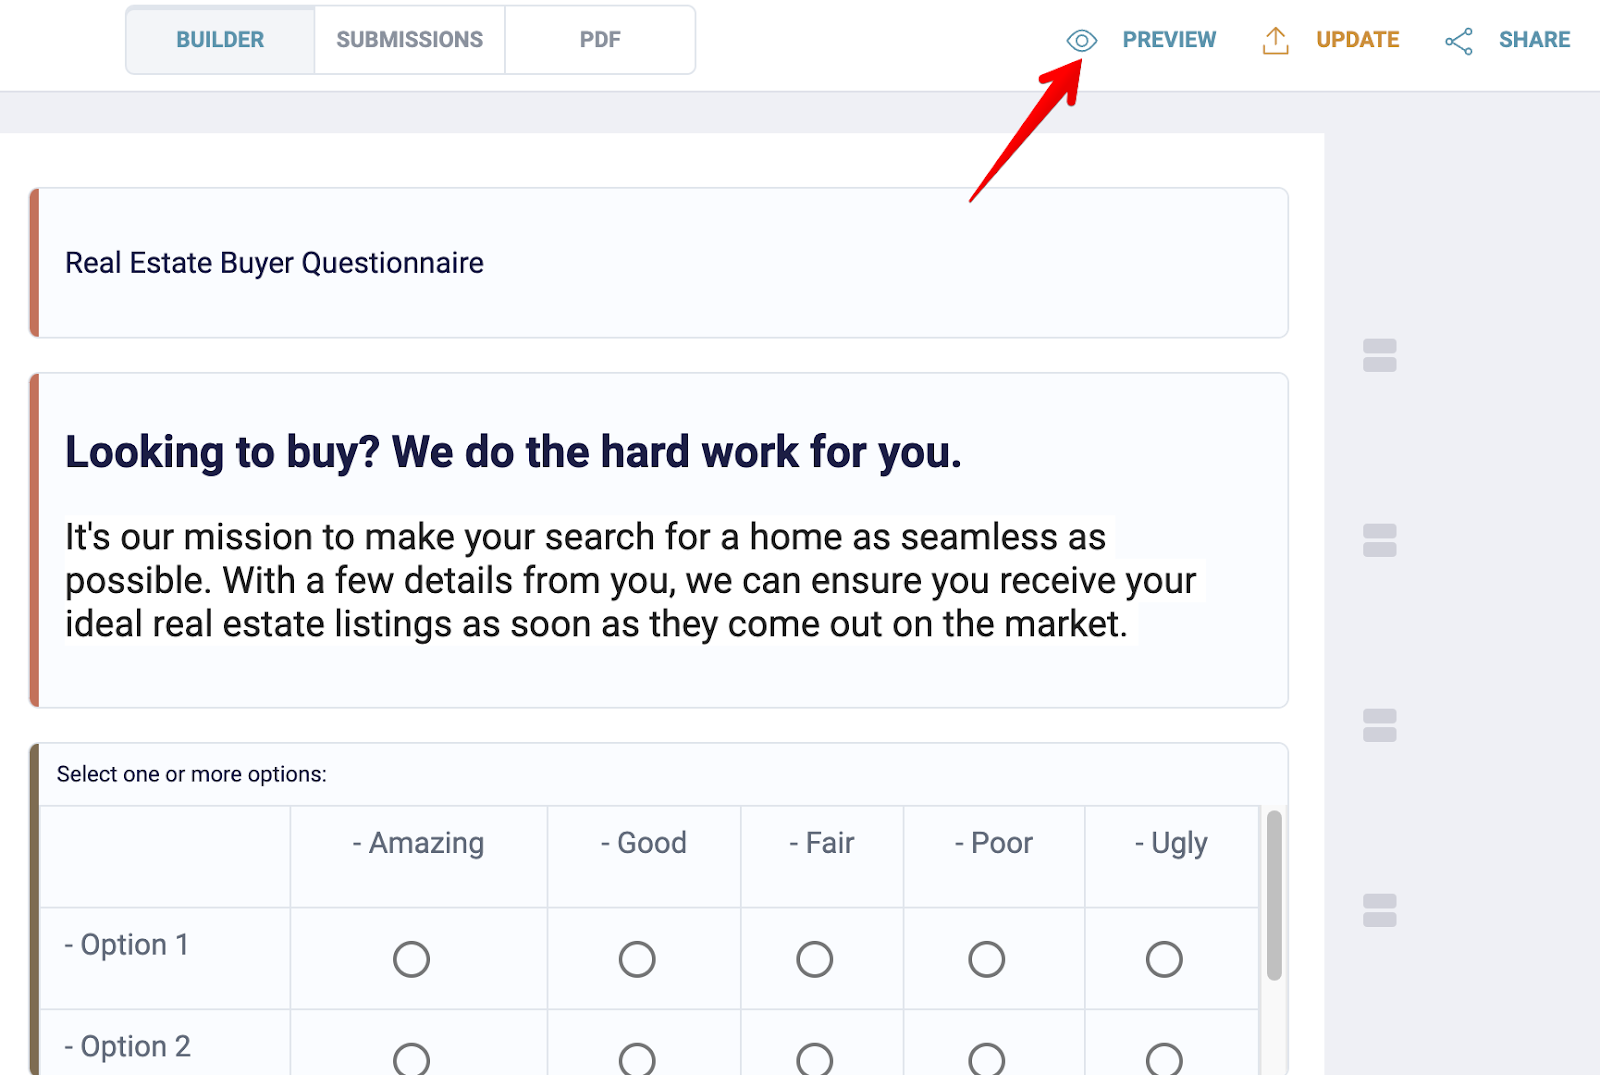
But before you embed your form onto your website, test it by clicking the “Preview” icon in the upper right-hand corner and checking if there are any mistakes.
Step 6: Publish your form on your website
Now it’s time to publish your form on your website, and with MightyForms, you can do this without having to write a single line of code. The entire process takes less than two minutes.
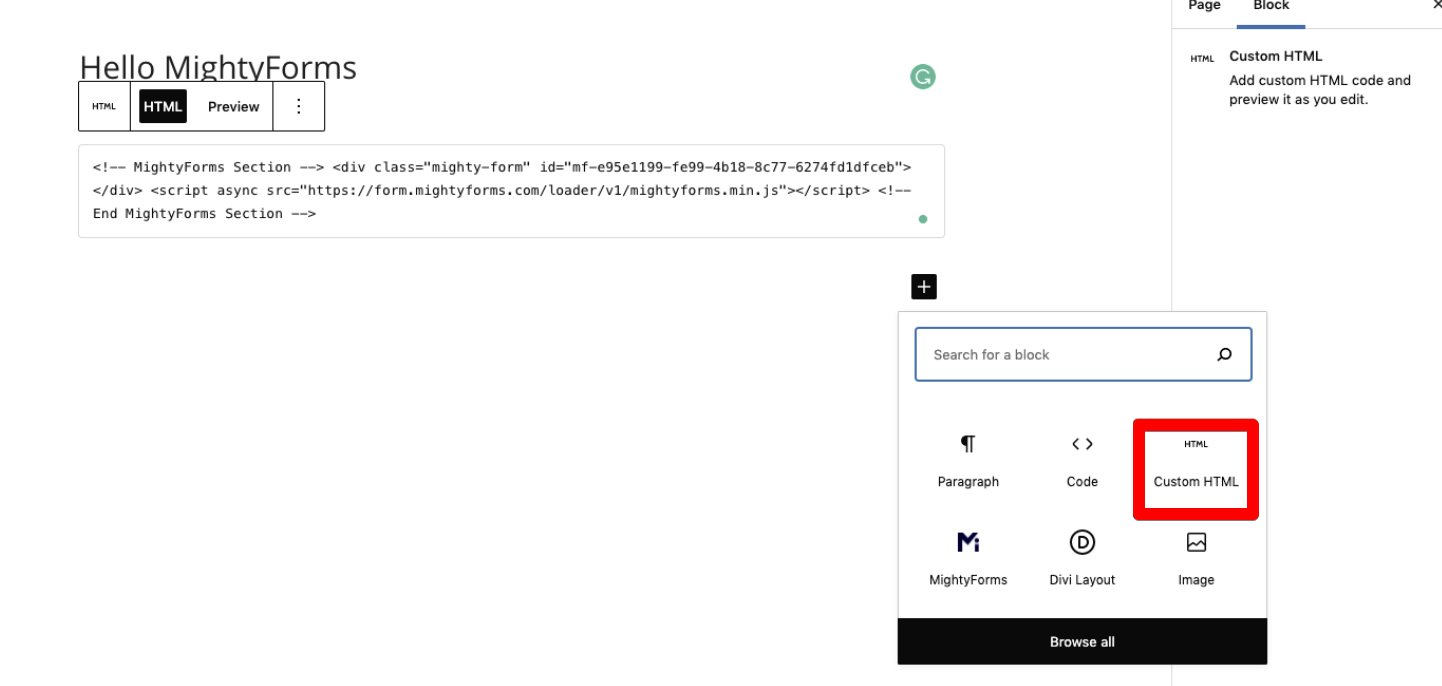
Navigate to your form, select “Publish,” and MightyForms will give you a piece of shortcode that you’ll have to paste onto the page you want to embed your form on.

So head to this page, add an HTML block, and paste this shortcode.
Once you’ve refreshed your website, you’ll find your new form on your webpage.
Step 7: Set up MightyForms automation
Managing your form responses at scale can quickly get messy. This is why we offer automation features so you can have certain actions automatically take place within other apps when someone submits a form.
For example, if you use Mailchimp for email marketing, you could integrate MightyForms and have MightyForms send the user’s email address to Mailchimp, where they’ll receive your newsletter.
Why we believe we’re the best online form builder
In addition to making it easy for you to create and embed website email forms, this is why we believe we’re the best online form builder.
Abandoned form recovery
With traditional form builders like Google Forms and Microsoft Forms, you can only access the information a user entered into your form after clicking the submit button.
This is a problem because it makes recovering abandoned leads really difficult. If a user enters their full name, email address, and other personal information into your form but doesn’t submit it, you won’t be able to reach out to them and ask them to complete their form.
This is why MightyForms collects information even if your user doesn’t submit your form. We’ll then automatically reach out to users’ who bounced, prompting them to complete your form.
Payment collection
Our secure payment gateway also sets us apart from other online form builders.
Most of our current customers have used Google Forms previously, and they have always complained about the lack of payment collection features. They either had to buy a third-party app or paste a link to their website checkout page.
So when we developed MightyForms, we used 256-bit end-to-end encryption, which is considered unbreakable by industry experts. This lets you securely collect payments within your form and have the money go directly to your PayPal or bank account.

Setting up a payment collection is really easy. All you have to do is select a form on your dashboard, and you’ll see a Stripe and PayPal field on the left-hand side. Drag and drop these fields onto your form, log into your Stripe or PayPal account, and the money you collect from users will go directly to you.

Form Analytics
We also pride ourselves in our AI analytics abilities. Instead of presenting you with a bunch of form statistics, we use AI to analyze this data and find ways you can improve your form’s completion rate.

Our AI works like this: It analyzes your form data, sees where users are bouncing, and if it spots any patterns, it’ll recommend making changes. For instance, if users bounce right before the signature field, we’ll suggest making it optional or removing it completely.
NPS Calculator
If you want to calculate your company’s NPS (Net Promoter Score) without adding up hundreds of survey results and running calculations yourself, then we can help.
With our built in NPS calculator, we’ll calculate your NPS as soon as respondents submit your form and present it to you on your analytics dashboard.

Simply drag and drop the “Rating” field on the left-hand side of your dashboard onto your form, and we’ll automatically track NPS.

Our algorithm uses the formula (NPS = % promoters - % detractors) to calculate your NPS score, so you don’t have to whip out your calculator and calculate it manually.
Next steps
If you’re looking for an online form builder that allows you to easily embed email forms on your websites, sign up for a MightyForms seven-day free trial.