
When choosing a form builder with conditional logic features, there are three factors you need to consider:
- The ability to visualize conditional rules: Many form builders don't allow you to visualize the flow of your conditional logic rules, which can make it difficult to spot and troubleshoot errors.
- The ability to set up various types of commands, not just IF/THEN statements: Many form builders only allow you to set up IF/THEN statements, which can be limiting.
- The ability to send different notifications based on respondents' inputs: Many form builders lack the features required to automatically send notifications to various team members based on what a respondent enters into their forms.
In order to help users choose the form builder with the best conditional logic features, we put together this guide. Below, we review the five most popular form builders available, starting with our solution, FormBuilder (previously MightyForms).
We designed FormBuilder with the conditional logic features mentioned above. So, if you want to get a first-hand feel for our tool, sign up for a free trial.
1. FormBuilder: Best conditional logic visualization features
Creating a conditional logic form with FormBuilder takes just a few seconds. Start by logging into your FormBuilder account and clicking the "Create a New Form" button on your dashboard. Alternatively, if you already have a form you want to add conditional logic to, you can select this existing form.

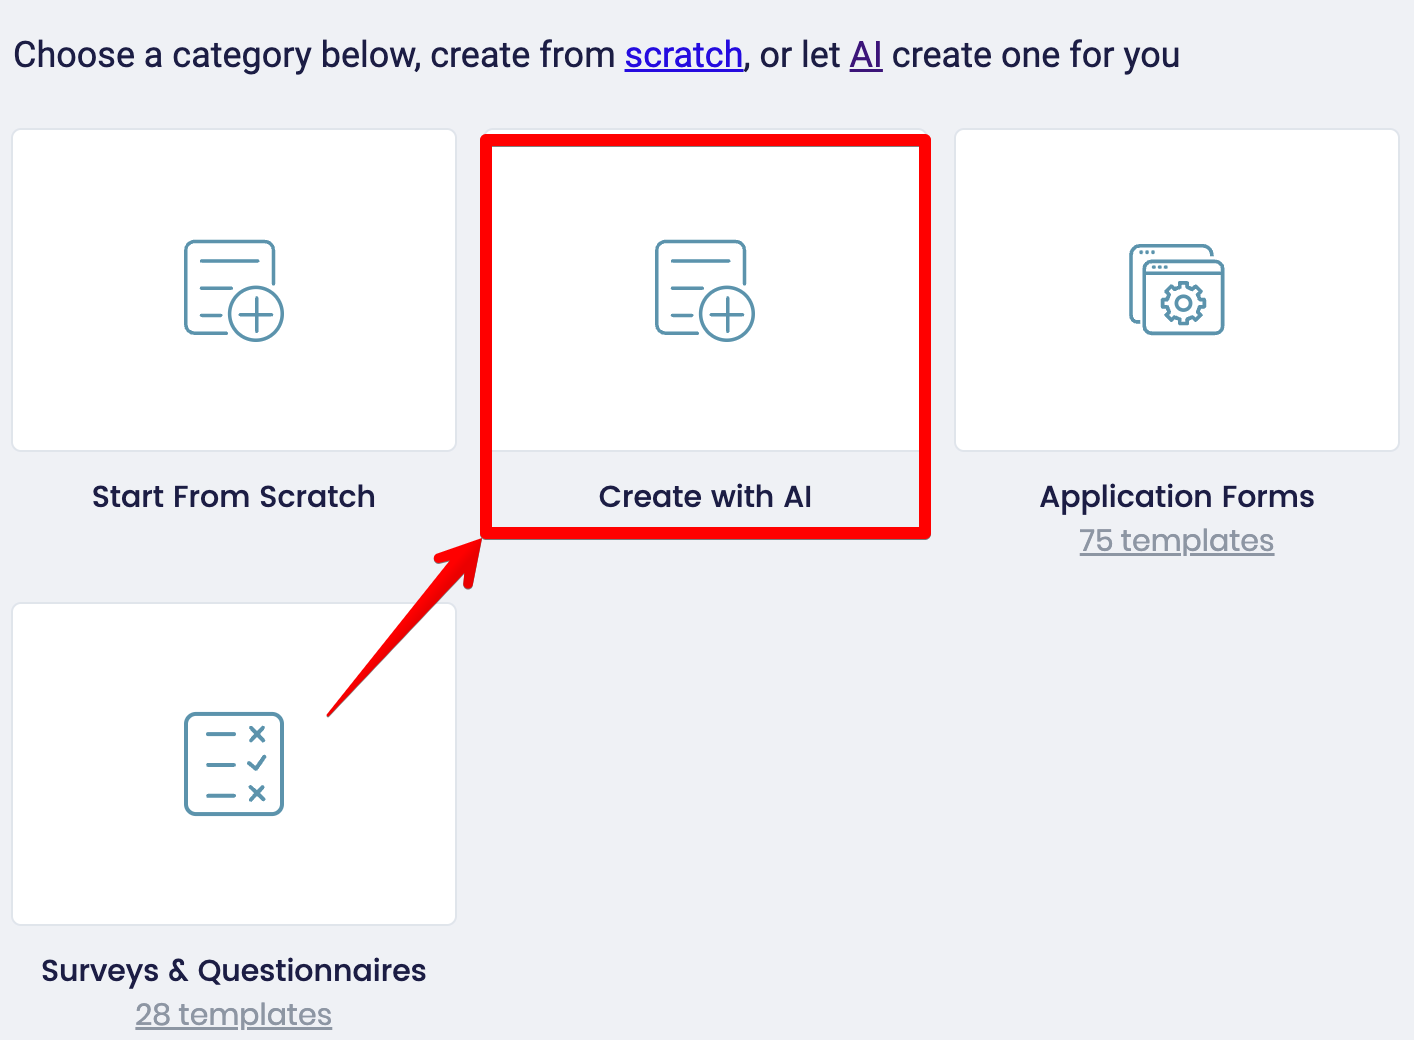
If you've created a new form, you'll be taken to a dashboard where you can choose a template, build your form from scratch, or have AI build one for you by clicking the “Create with AI” icon.
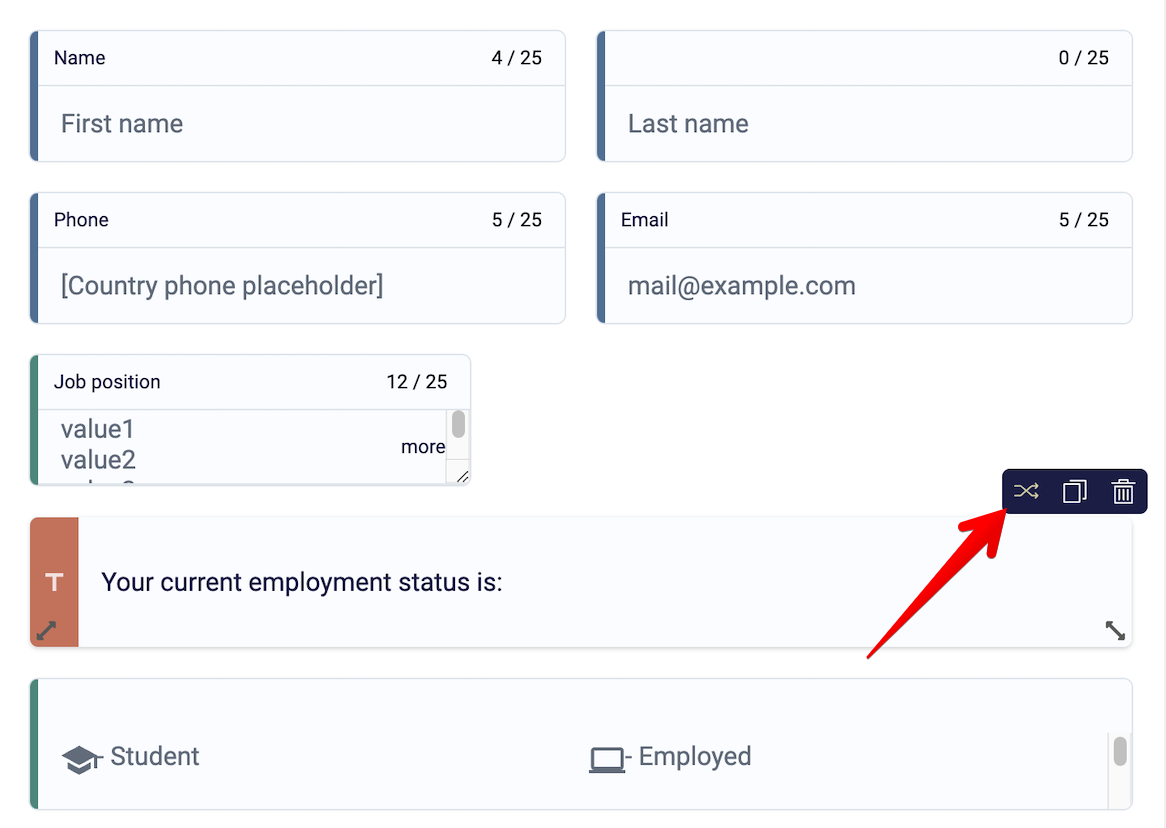
Next, you'll land on our editor's dashboard. On the left-hand side, you'll find fields to add to your form, including multiple-choice questions, open questions, image choice questions, and icons choice questions.

To create conditional logic rules, select the two overlapping arrows on the right-hand side of your screen.
This will take you to a dashboard that looks like this.
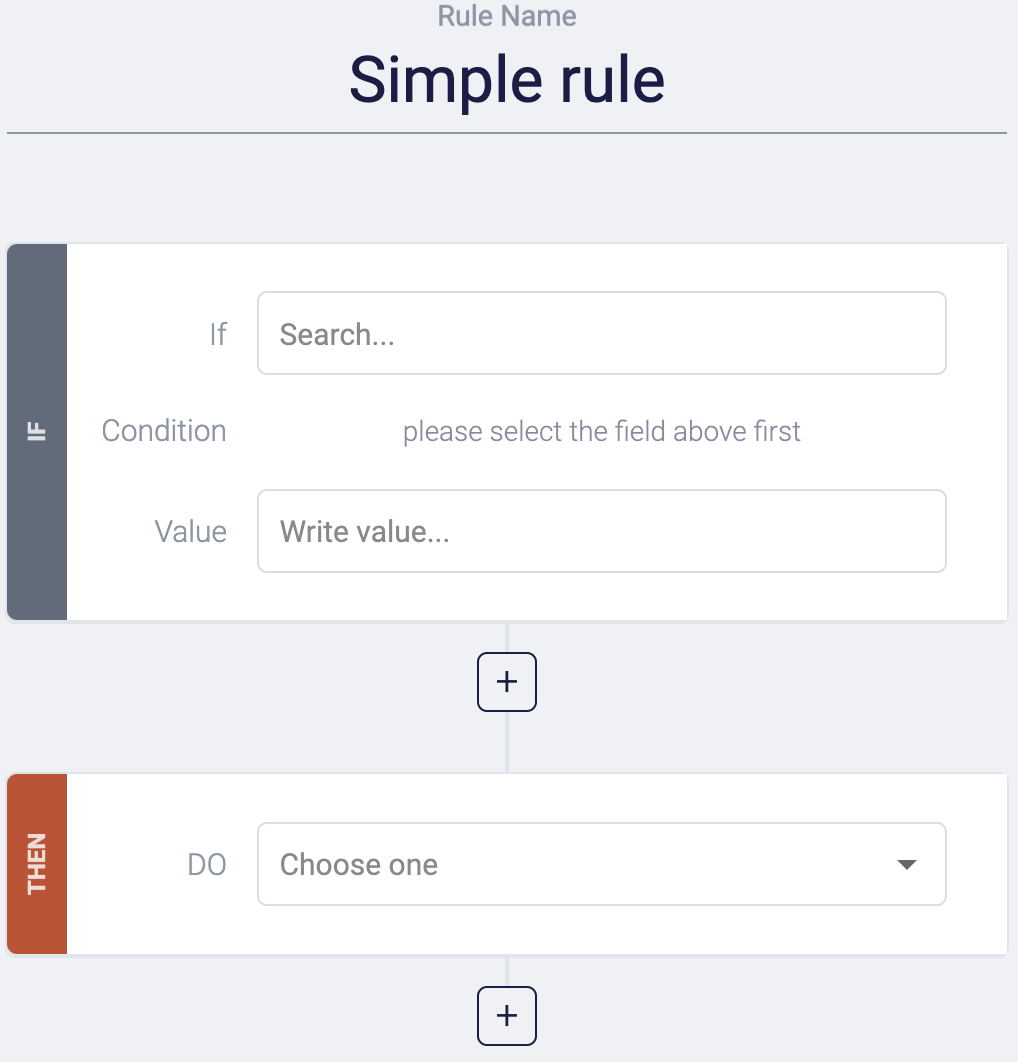
This is the conditional logic dashboard, and it makes setting up conditional logic easy by allowing you to visualize your logic rules and easily spot any mistakes.
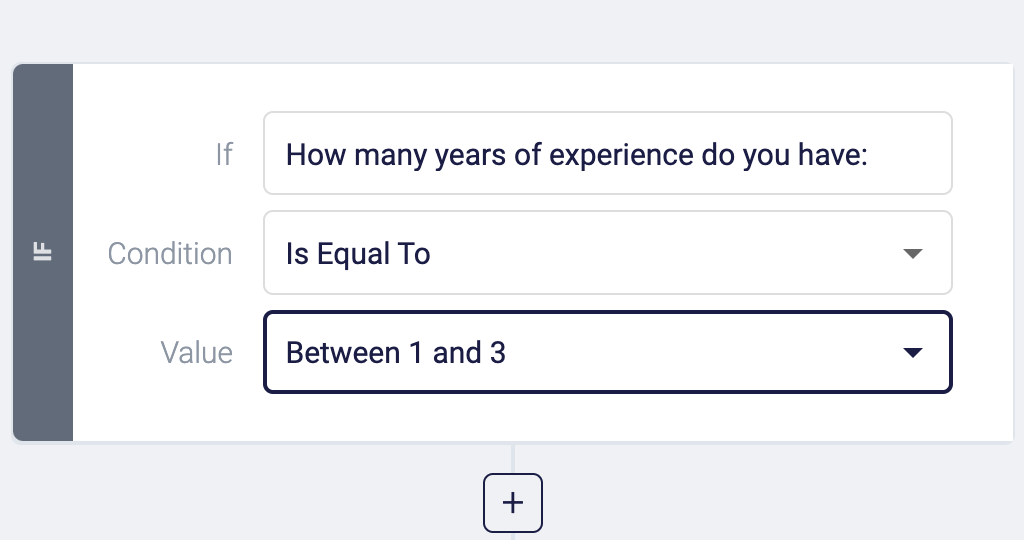
Begin by setting up an IF statement. This basically means what needs to be true in order for a condition to be met. For instance, let's say you're creating a job application form and looking for applicants with more than two years of experience. You could say: IF the answer to "how much experience do you have" equals “between 1 and 3 years.”
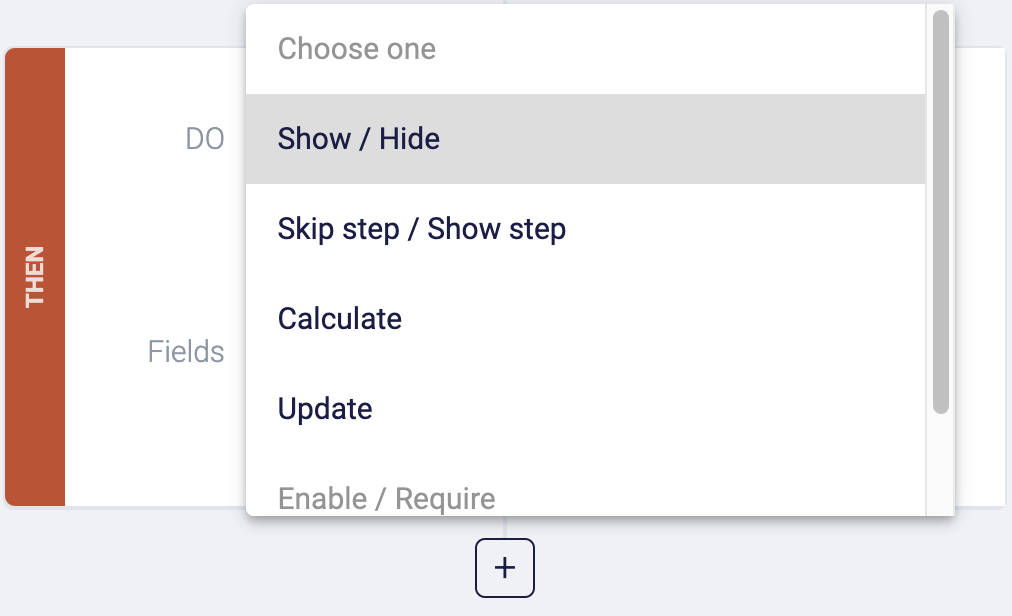
The next part involves setting up the THEN statement. This THEN statement essentially means what action needs to be performed when the above statement is true. You could say, IF the respondent replies with an answer of 2+ years, THEN show the question “When will you be able to start.” IF the respondent replies with less than 2 years, THEN end form.
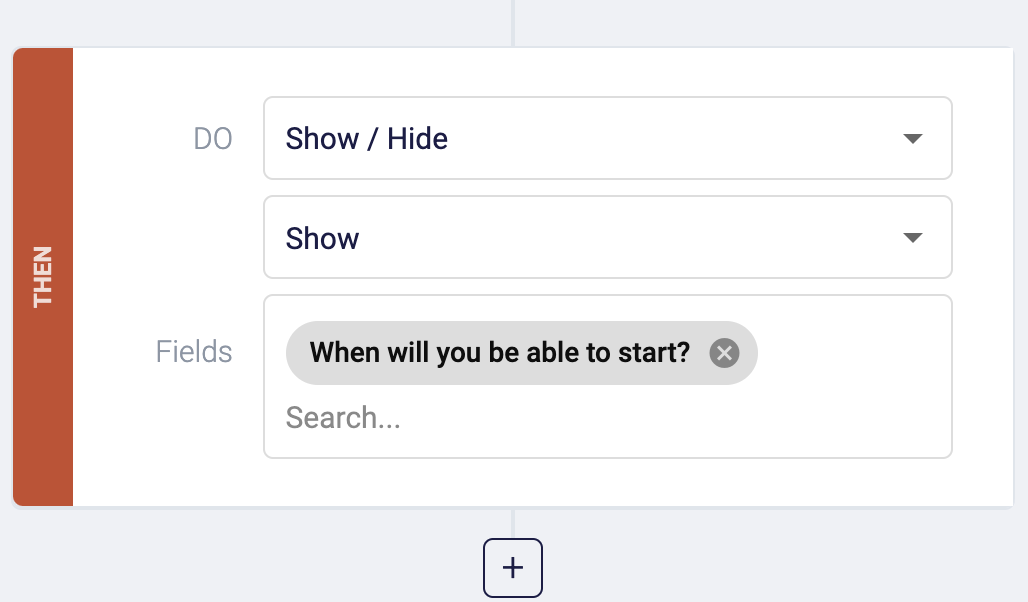
Note that, unlike many form builders, you aren't limited to just showing specific fields. You can skip steps, calculate values, hide fields, and update certain questions. This allows you to create more advanced forms than typical IF/THEN statements.
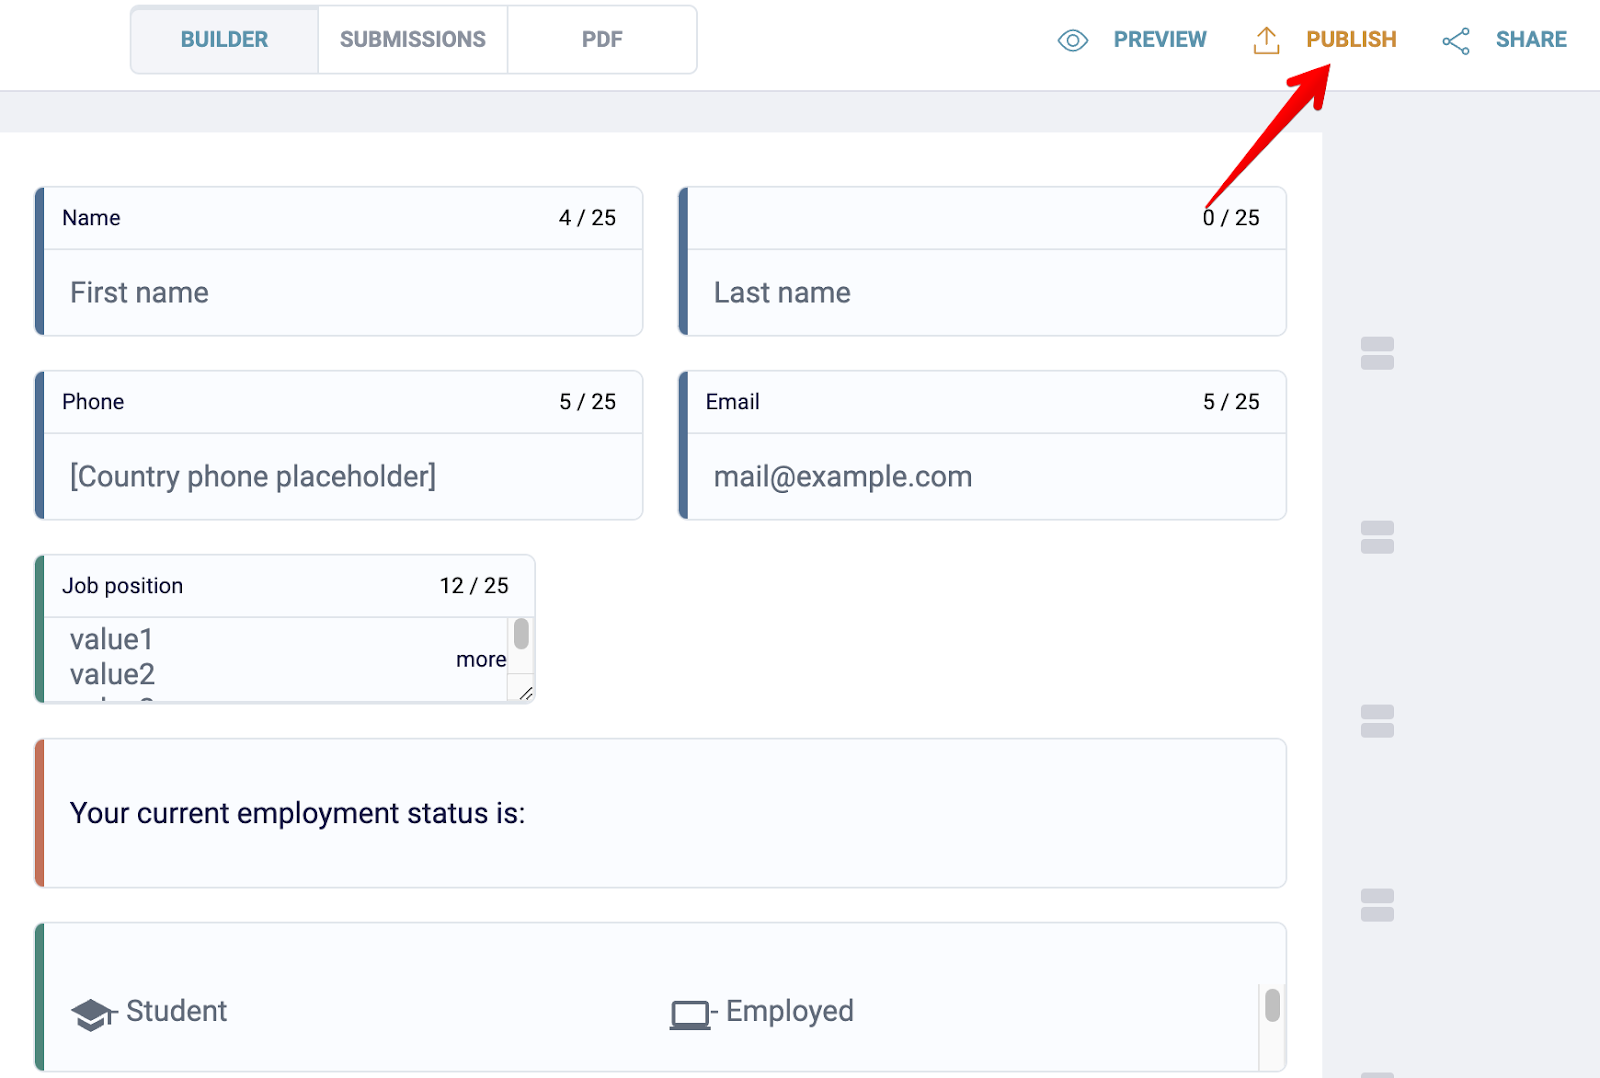
When you're happy with how your form's conditional logic is set up, simply click the “Publish” button in the upper right-hand corner of your screen to save your changes. Then click “Share” to share your form via link, email, or web form.
Notify various team members based on what information is entered
Another conditional logic feature we have is the ability to notify various teams and employees within your organization based on what the respondent typed into your form.
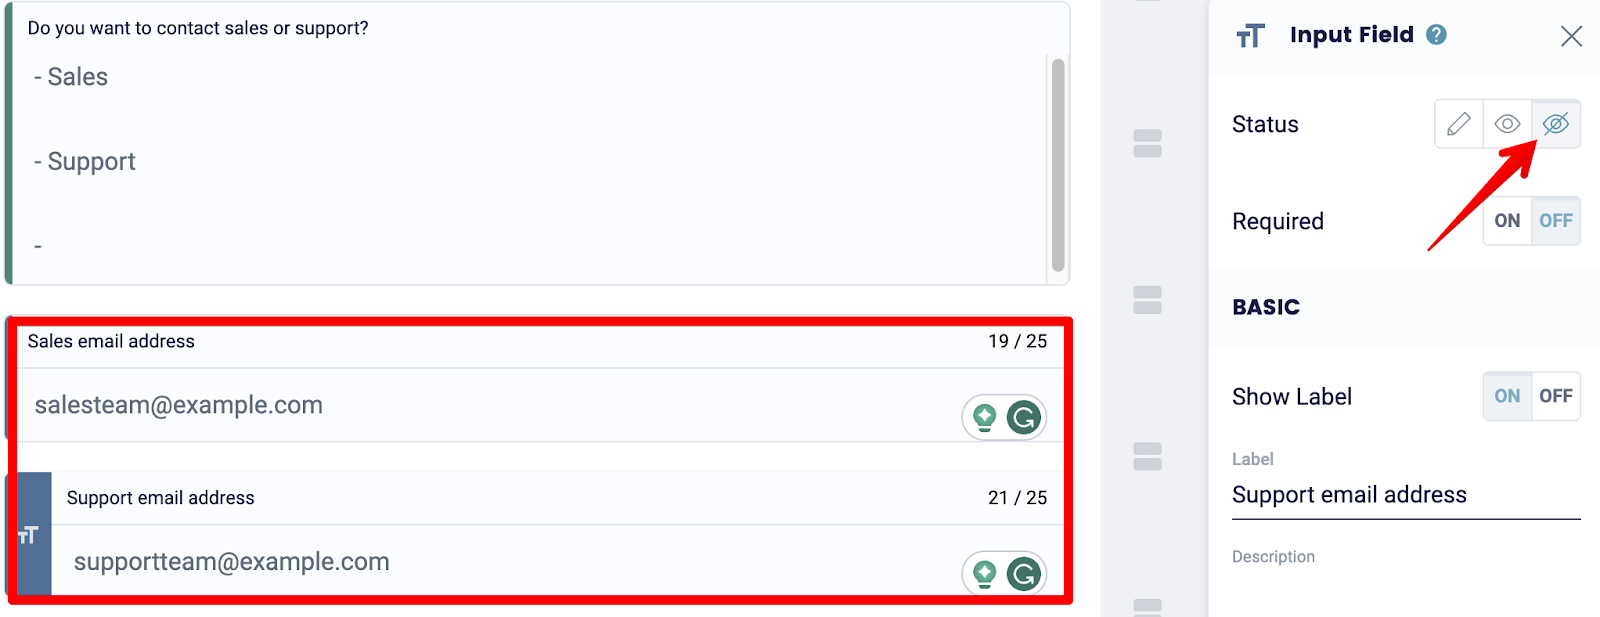
For instance, let's say you own a contracting business offering various services like painting, tiling, roofing, and plumbing. Someone lands on your contact form and says they are looking to get their home painted. You could set up conditional logic notifications to have FormBuilder automatically notify your painting team to inspect the customer's home and provide a quote.
To do this, simply head over to the question to which you want to add your conditional logic notification and enter your team's email address. But remember to hide this email address because you don't want it on the live form.
Next, save your form changes, click on the two overlapping arrows indicating the conditional logic features, and fill out the IF/THEN templates.

Do this for all the services you offer, and when you're ready, save your form, and you're good to go.
2. Google Forms
If you don't care about advanced conditional logic features, then Google Forms is a good choice for you. Google Forms is free and offers basic conditional logic features that you can use to send respondents to various questions depending on their answers.
To begin using Google Forms, simply head to Googleforms.com, and if you're logged into your Google account, you'll be able to create a form. From here, all you have to do is click on the two horizontal bars on the right-hand side of each question, and you can send users to specific questions based on what they answered.
This makes Google Forms a good option for basic forms. However, if you're creating more advanced forms, setting up conditional logic will be more of a hassle because you can't visualize your rules, and you have to split each question into its own separate sections.
3. Microsoft Forms
If you're already using Microsoft 365 and you don't want to sign up for another form builder, you'll be glad to know that Microsoft Forms has good condition logic features.
Microsoft Forms' conditional logic rules are really easy to use. To add conditional logic rules to your Microsoft Forms, go to the question you want to add logic to, click on the icon with the three dots, and select "Add branching."
From here, you'll be able to use a dropdown menu to select which question to send to respondents based on what they entered into your form.
However, like Google Forms, Microsoft Forms doesn't allow you to visualize the flow of your conditional logic rules, making it difficult to troubleshoot your form and find errors in your logic.
4. Jotform
If you're looking for more advanced conditional logic features, Jotform might be a good option.
In addition to having really flexible conditional logic features, Jotform has hundreds of templates you can use to build your form and integrates with several payment gateways, allowing you to collect payments easily.
To add conditional logic to your Jotform, click on the "Conditions" tab on the left-hand side of your screen. Here, you'll find a bunch of commands, including:
- Show/hide field: This command allows you to change the visibility of certain questions by showing or hiding follow-up questions.
- Update/calculate field: This command allows you to assign values to certain answers or calculate the values of various answers, which is great when creating quizzes and tests.
- Skip/hide page: This command lets you jump to various questions in your form.
- Change the thank you page: This command allows you to change the thank you page on your form based on how well your respondent did.
Once you've added all your conditions, you can save your changes and test your form to check if all your conditions are working correctly.
5. Typeform
The final form builder we'd like to feature is Typeform, not just because of its conditional logic features but because of the beautiful templates it offers.
What we liked about Typeform is that it encourages you to ask respondents one question at a time, which can reduce survey fatigue and increase form completion rates.
Regarding its conditional logic features, Typeform allows users to show respondents relevant questions based on what they entered into the form, as well as combine branching and calculations to create self-grading quizzes.
Typeform also has a clean dashboard where users can visualize their conditional logic, making it easy to spot errors and troubleshoot them.
Next steps
If you’re looking to try the conditional logic features we mentioned above, sign up for a free FormBuilder trial.